Good day, everyone!
No need to remind me that it's been almost a month since my last post. I know.
Work has me very busy (I'm full-time with a schedule ALL over the place) and I honestly haven't much time to cook, let alone blog it.
I promise I'll get better at managing my time.
Here's a link post for you all, though.
Things I'm loving lately:
BREAKFAST:
I make a mish-mash of these two recipes: http://mouthwateringfoods.blogspot.com/2013/03/chocolate-steel-cut-oats.html and http://budgetbytes.blogspot.com/2012/04/chocolate-banana-baked-oatmeal-359.html. I'm obsessed with overnight oats. So simple (throw everything in your slow-cooker and leave it!) and delicious, with so many options! It makes morning meals really quick and tasty. The browned bits on the edges are sometimes the best thing ever.
Protein pancakes are awesome! Some recipes are paleo, some are low-carb, but all are delicious!
DINNERS:
Brisket! Brisket is so easy to find here! We made this BBQ brisket recipe with my parents one night. *drools* So good. We used a local place's barbecue sauces and it was divine.
This vegan kabocha-lentil curry is fantastic and flavorful, though I recommend doubling the spices (and definitely add the tomatoes.
I would have these sweet potato burgers daily if I could! I used coconut flour instead of quinoa and added flax and another egg. They weren't as solid as the photos seem but oh my gosh were they tasty!
DESSERT:
The last two weeks have been filled with one dessert requested twice by my husband: Lemon meringue pie. We've used Alton Brown's recipe and it's soooo good! For gluten-free people, I suggest this pie crust recipe. It's still not 100% foolprood, but it tastes great.
Showing posts with label baking. Show all posts
Showing posts with label baking. Show all posts
Monday, April 22, 2013
Sunday, February 10, 2013
Gluten-Free Buttermilk Belgian Waffles
No one's recipe looked good enough to me, so I kind of took from here and there and made up my own!
They're light, airy, and super-crispy. Perfect waffle consistency. Sometimes I get tired of our dense gluten-free substitutes. But these are delicious.
Ingredients:
2 cups Carol's sorghum blend (or other AP flour...the sorghum blend is 35% sorghum flour, 35% potato starch, 30% tapioca starch)
2 t. baking powder
2 t. baking soda
Pinch of salt
Pinch of xantham gum
2 eggs, separated
1 3/4 cup buttermilk (or 1 3/4 cup milk with 1 T. vinegar or loemon juice whisked in, left to sit for 10 minutes)
1/4 cup oil
Instructions:
Preheat your waffle iron.
Mix all dry ingredients in a small bowl and set aside.
Mix together buttermilk, egg yolks, and oil in a large bowl. Add in dry ingredients and mix until just combined.
Using an electric mixture, beat egg whites on high speed until stiff peaks form.
Fold whites into the batter until almost combined. There should be small chunks of white throughout.
The batter will be thin. Don't let that concern you.
Spray your waffle iron with a little oil. Pour in 3/4 cup of batter (more or less depending on your iron size) and cook.

 Enjoy!
They're light, airy, and super-crispy. Perfect waffle consistency. Sometimes I get tired of our dense gluten-free substitutes. But these are delicious.
Ingredients:
2 cups Carol's sorghum blend (or other AP flour...the sorghum blend is 35% sorghum flour, 35% potato starch, 30% tapioca starch)
2 t. baking powder
2 t. baking soda
Pinch of salt
Pinch of xantham gum
2 eggs, separated
1 3/4 cup buttermilk (or 1 3/4 cup milk with 1 T. vinegar or loemon juice whisked in, left to sit for 10 minutes)
1/4 cup oil
Instructions:
Preheat your waffle iron.
Mix all dry ingredients in a small bowl and set aside.
Mix together buttermilk, egg yolks, and oil in a large bowl. Add in dry ingredients and mix until just combined.
Using an electric mixture, beat egg whites on high speed until stiff peaks form.
Fold whites into the batter until almost combined. There should be small chunks of white throughout.
The batter will be thin. Don't let that concern you.
Spray your waffle iron with a little oil. Pour in 3/4 cup of batter (more or less depending on your iron size) and cook.


Sunday, February 3, 2013
Gluten-Free Pizza Crust
It's crispy! It's holdable! It's tasty!
And it's quick!
Delicious pizza at your fingertips. It even put up with my gigantic portions of veggie toppings.
I used this recipe and my only change was the yeast. I didn't have instant, so instead of mixing the yeast in dry, I slurried it with the sugar and 1/2 cup of the water in order to "activate" it.
Also, it is REALLY sticky when you turn it out onto the pizza pans. Instead of just spraying the pan with oil, I'd also line it with parchment for extra-easy removal. You can't really roll it like one would "normal" pizza dough. Just press it to the edges.
I pre-baked the crusts for 20 minutes in a 400F oven with the racks in the lower part of it. After the crusts were lightly browned, I took them out (to put the toppings on) and reheated the oven to 475F. Then, I moved them to the middle once all the toppings were placed on.
A great thin crust! Even non-GF people will enjoy it!
 |
| Charles' man-pizza. |
 |
| My delicious vegetable pizza with feta and a little mozzarella. |
 |
| I was trying to demonstrate the holdability, but it was difficult and the flash went off :O. |
 |
| Bonus fluffy Iago. |
Monday, January 28, 2013
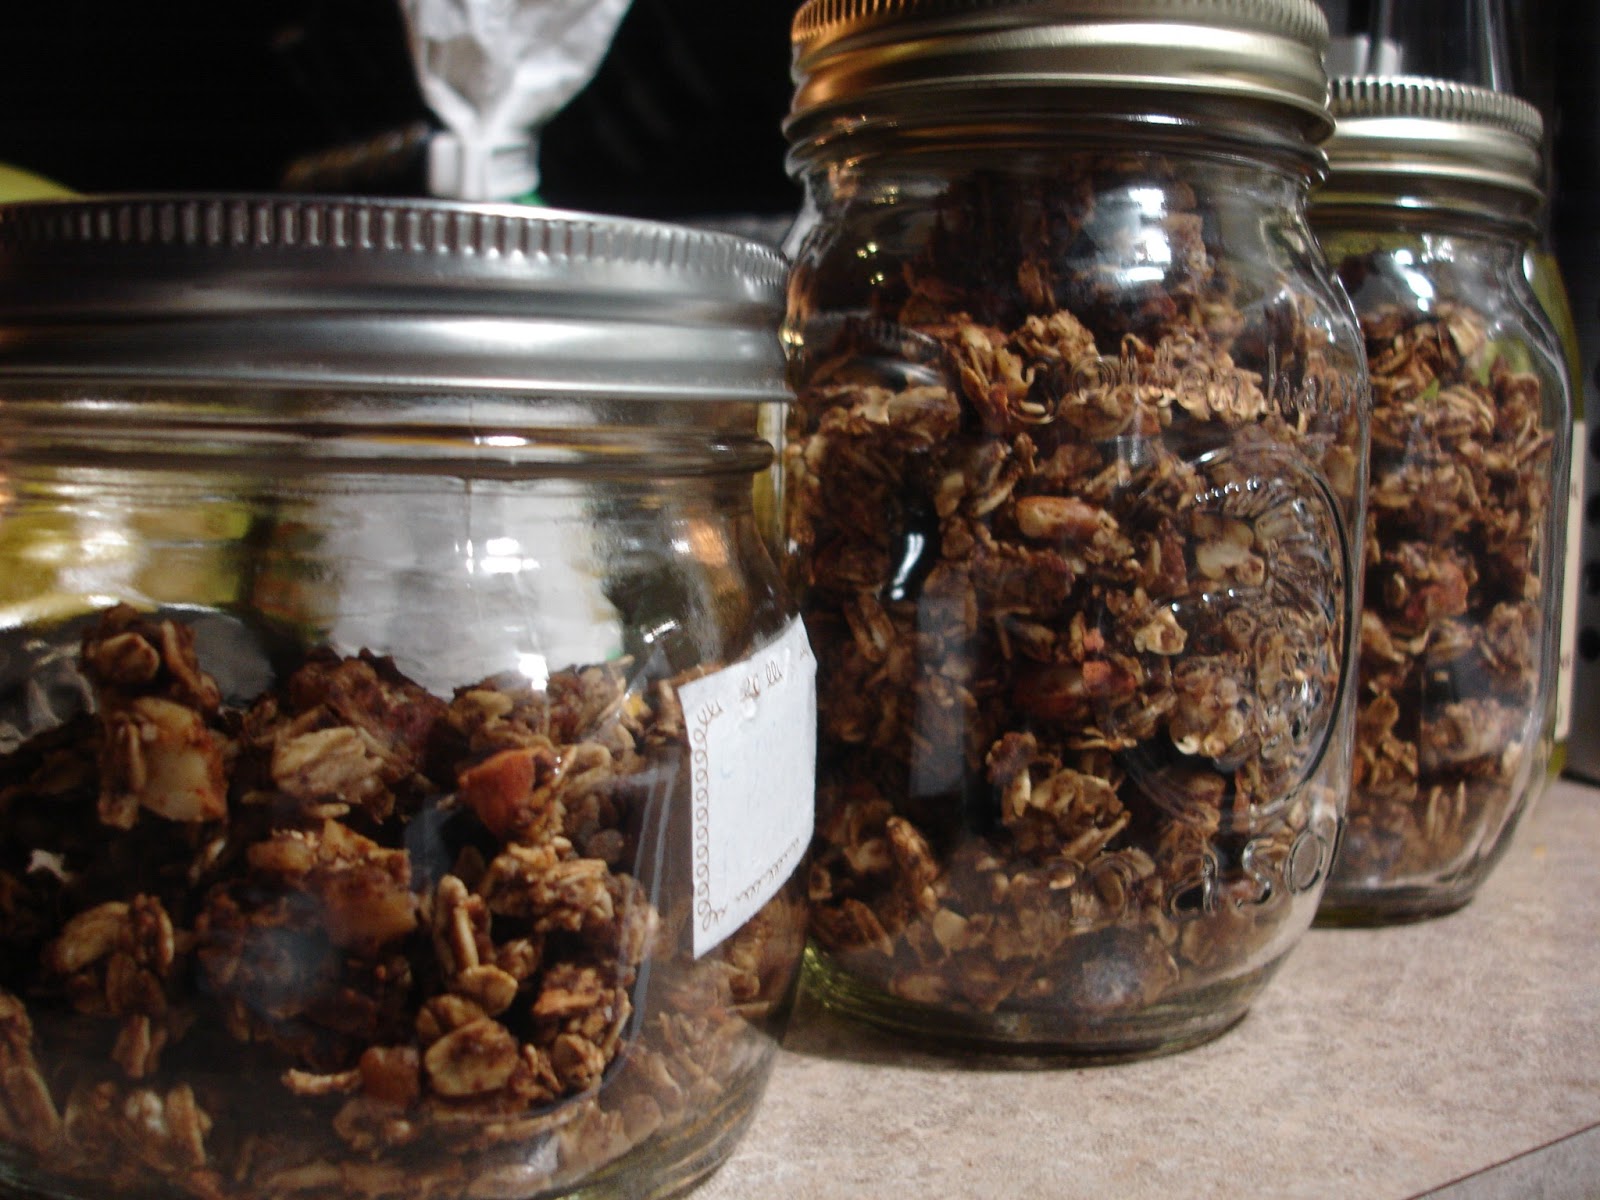
Chunky Apple Pie Granola
High protein snacks are what I go for, and who doesn't want some tasty homemade granola on their yogurt every day?
This recipe is super easy, and can be low-sugar, low-fat, AND high-protein with the aid of protein powder.
And it's vegan!
Ingredients:
2 cups GF rolled oats
1/4 cup hemp protein powder (or protein powder of your choice)
3/4 cup nuts of your choice, roughly chopped
1 t. ground cinnamon
1/2 t. ground ginger
1/4 t. salt
1/2 cup Splenda (OR 1/4 cup brown sugar)
2/3 cup unsweetened applesauce
1 t. vanilla extract
2 T. maple syrup
Instructions:
Preheat the oven to 325 degrees F and line a cookie sheet with parchment paper.
Mix all dry ingredients together in a large bowl.
Mix all wet in a small bowl.
Combine and adjust applesauce/sugars until you get sticky chunks of granola (not too wet!).
Bake in your preheated oven for 25-30 minutes, stirring everything around once or twice during baking.


Once done, you can toss in whatever dried fruits you like. It makes about a quart, and is DELICIOUS. Store in an airtight container!
This recipe is super easy, and can be low-sugar, low-fat, AND high-protein with the aid of protein powder.
And it's vegan!
Ingredients:
2 cups GF rolled oats
1/4 cup hemp protein powder (or protein powder of your choice)
3/4 cup nuts of your choice, roughly chopped
1 t. ground cinnamon
1/2 t. ground ginger
1/4 t. salt
1/2 cup Splenda (OR 1/4 cup brown sugar)
2/3 cup unsweetened applesauce
1 t. vanilla extract
2 T. maple syrup
Instructions:
Preheat the oven to 325 degrees F and line a cookie sheet with parchment paper.
Mix all dry ingredients together in a large bowl.
Mix all wet in a small bowl.
Combine and adjust applesauce/sugars until you get sticky chunks of granola (not too wet!).
Bake in your preheated oven for 25-30 minutes, stirring everything around once or twice during baking.

Once done, you can toss in whatever dried fruits you like. It makes about a quart, and is DELICIOUS. Store in an airtight container!
Monday, January 21, 2013
Sour-Cream Apple Coffee Cake with Oat Crumble
Sometimes you need a really good, dense coffee cake to satisfy those winter-driven sugar cravings.
And I wanted streusel/crumble on top, so I combined two recipes.
Both are from Carol Fenster's 1000 Gluten-Free Recipes, which I highly recommend, if only for the baked goods recipes. The rest are kind of blah and can be found readily on blogs throughout the internet.
Ingredients:
Cake:
1/2 cup melted butter/canola oil
1 cup sugar
2 eggs
1 t. vanilla extract
1/2 t. lemon extract (optional)
1 cup sour cream (this can also be swapped out for plain Greek yogurt)
2 cups Carol's sorghum blend (35% sorghum flour, 35% potato starch, 30% tapioca starch)
1 t. baking powder
1/2 t. baking soda
1/2 t. salt
1 t. cinnamon
1 t. ginger (I used fresh)
2 cups diced Granny Smith apples
Crumble:
1 cup gluten-free rolled oats
1/2 cup Carol's sorghum blend
1/2 cup finely chopped nuts (I used pecans, but walnuts or almonds can be used as well)
2-3 T. maple syrup
2 T. brown sugar
3-4 T. melted butter
1 t. vanilla extract
1/2 t. ground cinnamon
Pinch of salt
Instructions:
Preheat your oven to 350 degrees Fahrenheit. Butter and (gf) flour a springform pan for the cake (this makes cake-removal easier and looks really nice--if you want to use a normal cake pan, just make sure it will all fit).
In a large bowl, mix your oil/butter, eggs, and sugar with an electric mixer until smooth.


In a separate smaller bowl, mix together all your dry ingredients. Add them in batches to the wet mixture and mix until combined.


Enjoy! This is also amazing with a little scoop of ice cream.
And I wanted streusel/crumble on top, so I combined two recipes.
Both are from Carol Fenster's 1000 Gluten-Free Recipes, which I highly recommend, if only for the baked goods recipes. The rest are kind of blah and can be found readily on blogs throughout the internet.
Ingredients:
Cake:
1/2 cup melted butter/canola oil
1 cup sugar
2 eggs
1 t. vanilla extract
1/2 t. lemon extract (optional)
1 cup sour cream (this can also be swapped out for plain Greek yogurt)
2 cups Carol's sorghum blend (35% sorghum flour, 35% potato starch, 30% tapioca starch)
1 t. baking powder
1/2 t. baking soda
1/2 t. salt
1 t. cinnamon
1 t. ginger (I used fresh)
2 cups diced Granny Smith apples
Crumble:
1 cup gluten-free rolled oats
1/2 cup Carol's sorghum blend
1/2 cup finely chopped nuts (I used pecans, but walnuts or almonds can be used as well)
2-3 T. maple syrup
2 T. brown sugar
3-4 T. melted butter
1 t. vanilla extract
1/2 t. ground cinnamon
Pinch of salt
Instructions:
Preheat your oven to 350 degrees Fahrenheit. Butter and (gf) flour a springform pan for the cake (this makes cake-removal easier and looks really nice--if you want to use a normal cake pan, just make sure it will all fit).
In a large bowl, mix your oil/butter, eggs, and sugar with an electric mixer until smooth.

Add in your sour cream and extracts. Mix until smooth.

In a separate smaller bowl, mix together all your dry ingredients. Add them in batches to the wet mixture and mix until combined.

Stir in your diced apples and freshly grated ginger.

Pour into prepared cake pan and bake for 30-35 minutes, or until a toothpick inserted in the center comes out clean.

While your cake has begun baking, mix together all the topping ingredients until there are chunks of crumble-topping. If it's not sticky enough, add more syrup. If it's too dry, add more butter.

When your cake has 15 minutes left of bake-time, crumble the topping over the cake and lightly press down. Don't burn yourself!

Bake until finished, and allow to cool a bit before popping the sides off of the pan.
Enjoy! This is also amazing with a little scoop of ice cream.
Friday, January 11, 2013
Slightly Sweet & Spicy Baked Beans
I threw this together, not wanting typical sweet baked beans, not quite wanting charro beans, but something in between. We had it with our delicious barbecue pork! (It was then somehow glutened, so, alas, I cannot eat the delicious leftovers.)
Ingredients:
6 oz. bacon, diced
1 medium onion, diced
1 green bell pepper, diced
4 cloves of garlic, minced
1 15 oz. can of kidney beans, drained and rinsed
1 15 oz. can of white beans, drained and rinsed
1 28 oz. can of diced tomatoes
2 t. yellow mustard
1 T. (or more) sriracha
3 T. fancy molasses
1 T. worcestershire sauce
3 T. red wine vinegar
Dash of liquid smoke
2 t. dried oregano
Instructions:
Stir all ingredients together!


Eat the deliciousness!
Ingredients:
6 oz. bacon, diced
1 medium onion, diced
1 green bell pepper, diced
4 cloves of garlic, minced
1 15 oz. can of kidney beans, drained and rinsed
1 15 oz. can of white beans, drained and rinsed
1 28 oz. can of diced tomatoes
2 t. yellow mustard
1 T. (or more) sriracha
3 T. fancy molasses
1 T. worcestershire sauce
3 T. red wine vinegar
Dash of liquid smoke
2 t. dried oregano
Instructions:
Stir all ingredients together!


Bake in a 400 degree preheated oven for 50-55 minutes, until liquid has been absorbed. Uncover if it's not absorbing enough! Taste and adjust any seasonings.

Eat the deliciousness!
Friday, November 9, 2012
Old-Fashioned Sorghum Molasses Drop Cookies
I like these gluten-free cookies because they don't require three or four different kinds of gluten-free flour in the recipe, just one! And they are delightfully chewy, like gingersnaps, only a bit less ginger.
I pulled this out of 1,000 Gluten-Free Recipes by Carol Fenster--if you're gluten-intolerant/celiac/allergic, I highly recommend it! Everything I've made out of it is fantastic.
Ingredients:
1/4 cup butter, softened/room temperature
1/4 cup packed light brown sugar
1 large egg
1/4 cup molasses (not blackstrap)
1/4 t. vanilla extract
2 cups sorghum flour
2 t. ground cinnamon
1 t. ground ginger
1/2 t. xanthan gum
1/2 t. baking soda
1/4 t. salt
2 T. granulated sugar (for rolling)
Instructions:
Preheat your oven to 350 degrees F. Prepare 2 baking sheets with parchment paper/another non-stick element.
In a large bowl, beat butter and sugar until smooth. Add in the egg and beat until combined. Do the same with the molasses and the vanilla.

In another small bowl, combine the sorghum flour, cinnamon, ginger, xanthan gum, baking soda, and salt.
 Add it in batches to the wet mixture, using an electric mixer.
 When well-mixed, either immediately make your cookies, or refrigerate the dough until you are ready.
Take a small spoon, scoop out the dough, and roll 1-inch balls of dough between your hands, rolling them in the sugar once formed.

Place them on your baking sheet and flatten them slightly. You should end up with 24-30 cookies.
Bake in the preheated oven for 7-10 minutes, until they are cracked and golden-brown all over.
 Enjoy!
I pulled this out of 1,000 Gluten-Free Recipes by Carol Fenster--if you're gluten-intolerant/celiac/allergic, I highly recommend it! Everything I've made out of it is fantastic.
Ingredients:
1/4 cup butter, softened/room temperature
1/4 cup packed light brown sugar
1 large egg
1/4 cup molasses (not blackstrap)
1/4 t. vanilla extract
2 cups sorghum flour
2 t. ground cinnamon
1 t. ground ginger
1/2 t. xanthan gum
1/2 t. baking soda
1/4 t. salt
2 T. granulated sugar (for rolling)
Instructions:
Preheat your oven to 350 degrees F. Prepare 2 baking sheets with parchment paper/another non-stick element.
In a large bowl, beat butter and sugar until smooth. Add in the egg and beat until combined. Do the same with the molasses and the vanilla.

In another small bowl, combine the sorghum flour, cinnamon, ginger, xanthan gum, baking soda, and salt.


Take a small spoon, scoop out the dough, and roll 1-inch balls of dough between your hands, rolling them in the sugar once formed.

Place them on your baking sheet and flatten them slightly. You should end up with 24-30 cookies.
Bake in the preheated oven for 7-10 minutes, until they are cracked and golden-brown all over.

Friday, October 12, 2012
Pumpkin Puree
Just an alert, ladies. Apparently when you drop below 20% body fat, your hormones can get all out of whack and cause lady problems.
Thank goodness it's fall, and I'll be gaining winter weight anyway.
Speaking of fall, I love October. Why do I love October?
Pumpkins.
Now, people. Pumpkins are not just for carving. Or, what people seem to do here, just setting out on your porch as decorations.
Pumpkins are for eating.
I get sad watching the untouched pumpkins just sit and rot at all the houses in the area. I want to steal them and put them to use in delicious desserts and soups and meals. Make tasty snacks of their pepitas. Feast on their delicious flesh.
Don't buy canned pumpkin puree. Just make your own. I got about 16 cups (that's almost 4 liters, Europeans/anyone NOT in 'Murica) out of a single pumpkin.
It was a huge pumpkin, yes. But ONE. That I bought for $2, because apparently pumpkins are sold dirt cheap here since no one uses them as food.
So how do you do this?
Preheat your oven to 325 degrees F, and prepare 1-2 baking sheets with oil/cooking spray (depends on how big your pumpkin is).
Take your pumpkin. Cut out the top, like you would prepping it to carve.

Cut it in half.
 Scoop out the guts/seeds (save the seeds to make tasty snacks!).
 Some people proceed to cut it into smaller pieces, but I don't. I find it easier to roast two halves.
Spray/brush cut sides of the pumpkin halves with olive oil. Place cut-side down on prepared baking sheets.

Bake in the oven for 40-50 minutes (mine took about an hour), or until a fork easily pierces the skin. Allow to cool.
Scoop flesh out of the skin and place in batches in a blender/food processor. Puree.
I then pour mine into little freezer bags, in 2 cup portions, and freeze most of it for later use.
The possibilities are endless!
Thank goodness it's fall, and I'll be gaining winter weight anyway.
Speaking of fall, I love October. Why do I love October?
Pumpkins.
Now, people. Pumpkins are not just for carving. Or, what people seem to do here, just setting out on your porch as decorations.
Pumpkins are for eating.
I get sad watching the untouched pumpkins just sit and rot at all the houses in the area. I want to steal them and put them to use in delicious desserts and soups and meals. Make tasty snacks of their pepitas. Feast on their delicious flesh.
Don't buy canned pumpkin puree. Just make your own. I got about 16 cups (that's almost 4 liters, Europeans/anyone NOT in 'Murica) out of a single pumpkin.
It was a huge pumpkin, yes. But ONE. That I bought for $2, because apparently pumpkins are sold dirt cheap here since no one uses them as food.
 |
| Excuse my pale and sickly appearance. I was tired and not feeling 100%. |
Preheat your oven to 325 degrees F, and prepare 1-2 baking sheets with oil/cooking spray (depends on how big your pumpkin is).
Take your pumpkin. Cut out the top, like you would prepping it to carve.

Cut it in half.


Spray/brush cut sides of the pumpkin halves with olive oil. Place cut-side down on prepared baking sheets.

Bake in the oven for 40-50 minutes (mine took about an hour), or until a fork easily pierces the skin. Allow to cool.
Scoop flesh out of the skin and place in batches in a blender/food processor. Puree.
 |
| This is half the pumpkin's puree. |
I then pour mine into little freezer bags, in 2 cup portions, and freeze most of it for later use.
The possibilities are endless!
Sunday, September 9, 2012
Mango-Strawberry Crumble
I had a ton of way-over-ripe (about to go bad) mangos in my fridge and was searching for something to make with them. I sort of made this up as I went along--take measurements with a grain of salt! It came out really great, and vanilla ice cream is a perfect addition to it.
Ingredients:
Filling
2 very ripe mangos, cubed (should be about 2-3 cups of mango flesh, my mangos were massive)
15-20 strawberries, hulled and sliced (about 1.5 cups)
2 tablespoons of sugar (adjust depending on your tastes, I don't find that mangos and strawberries need a lot of extra sugar)
Juice of 2 limes, or 1 lemon
1 T. cornstarch or other starch
1 t. cinnamon
Topping
1 recipe gluten-free pie crust (I had one premade)
1/2 cup coarsely ground almonds
1/2 cup brown rice flour
1 t. cinnamon
1/4 cup brown sugar
Instructions:
Butter a square 8x8 baking pan. Preheat the oven to 375 degrees Fahrenheit.
Toss together the filling ingredients in a bowl and pour into the pan.
Combine the topping ingredients in another bowl and crumble them together with your fingers until they're in small chunks. Sprinkle evenly over the filling.
Bake in your preheated oven for 35-45 minutes, until the filling is cooked and the topping is well-browned.
....we ate it before I could take pictures. It was delicious.
Subscribe to:
Posts (Atom)